
In a perfect home decor world, all of your closets, bookshelves, kitchen cabinets and even dressers, would all come with custom sized storage boxes and bins that match their measurements. Life as we know, is nothing like this and you wind up wondering who is plotting against you.
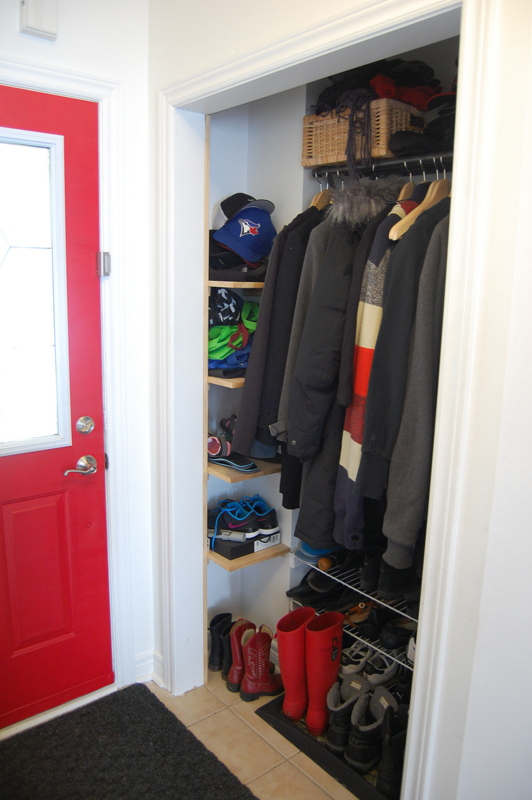
First of all, let me just say that I had absolutely no intention of making storage boxes for our front closet for that reason. After my husband James had made these cubby holes/shelves for it, I had planned on buying some storage boxes to store the mess that you see on them in the photo below.
I mean how hard could it be to find storage boxes that fit the shelves below?
Apparently, very hard.
You know how when you go to a blog and they do some kick ass IKEA hack and turn bookcases into built in’s or a bench under a window? And that piece of furniture from IKEA that they used, was the exact measurement that fit for that exact space in their home?
Well, our home is like the opposite of that.
Doesn’t matter where, there is always some room or area that is 3/4″ too long or 1.5″ too short, for any pre-store bought item to fit into it. It’s one of the top reasons we do so many custom DIY projects. We just can’t find the items in the stores.
Shelves without storage boxes – Here’s the Solution!
The cubby holes (shelves) were no exception.
So for almost a year I searched and we lived with that epic mess of mittens falling down, hats toppling over each other and grocery bags squished in. Finally I admitted defeat and said I needed to sort out a way to make some because I could not stand looking at the mess anymore.
How to Make Custom Sized Storage Boxes
I went over various pros and cons of materials to make the storage boxes.
- Nothing heavy that could fall on my kids feet, so wood was out of the question.
- I didn’t want all fabric ones as they can get floppy and lose their shape over time.
- I needed a lightweight material that could still maintain a box shape and look a little cleaner.
The Solution?
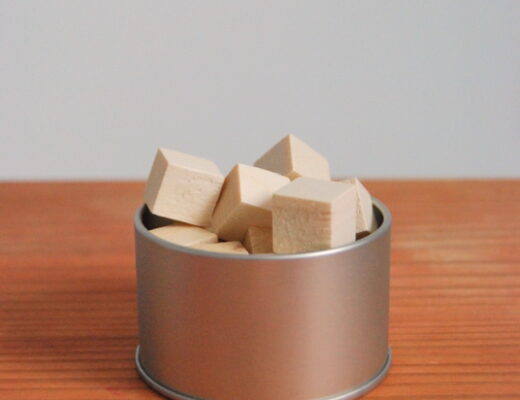
Elmer’s Craft Foam boards. They’re in every single Dollarama and Dollar Tree around and will run you $1.25 a board.
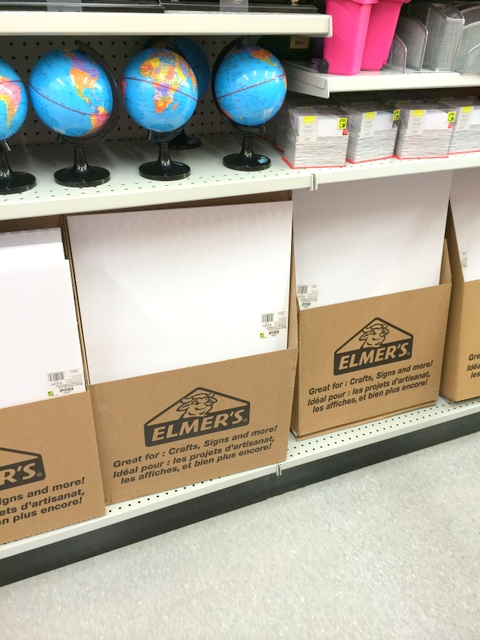
These foam boards measure 20″ W x 30″ H.
I was making boxes that were an irritating 10″ W x 11.5″ D x 10.5″ H. Or something like that. Because they’re custom sized, you need cut out the template sides in the sizes that you’ll need for your spaces.
ITEMS YOU NEED TO MAKE YOUR CUSTOM STORAGE BOXES
- Foam Boards.
- X-acto knife and a safe surface to cut them on (I did mine over carpet – don’t do that).
- White duct tape.
- Fabric or materials of your choice as decor. I used drop cloth.
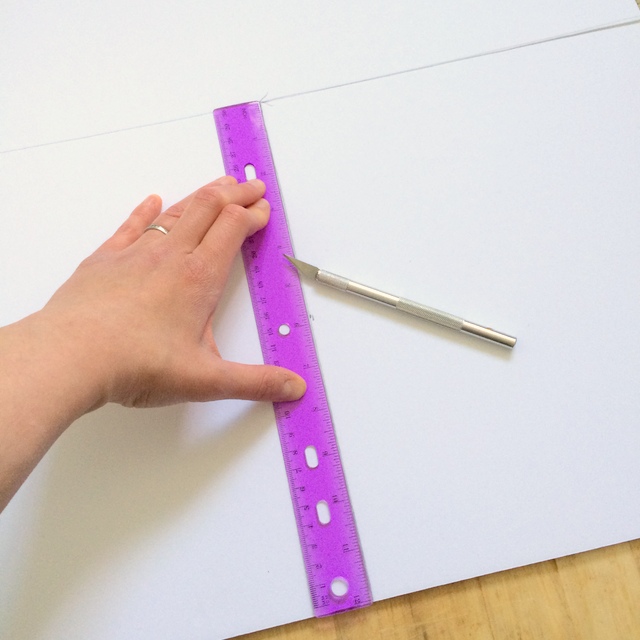
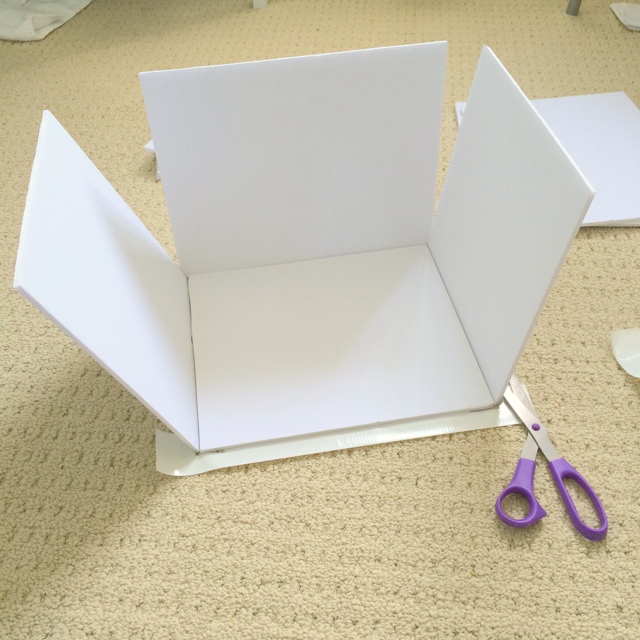
STEP 1
First, I measured out my template pieces and then using an X-acto knife and a ruler, I cut out the foam pieces over a cutting board.
NOTE: By the way, this tutorial should also be a huge lesson in how not to take photos for a tutorial. For starters, don’t pick a day where it’s raining and insanely dark outside. Second don’t try to take photos of white boards on cream carpet, then add cream colored drop cloth to that mix and except a good result.
I apologize.
I was in one of those I need to get these made moods. There is so much beige and cream in this post I can’t even handle it.
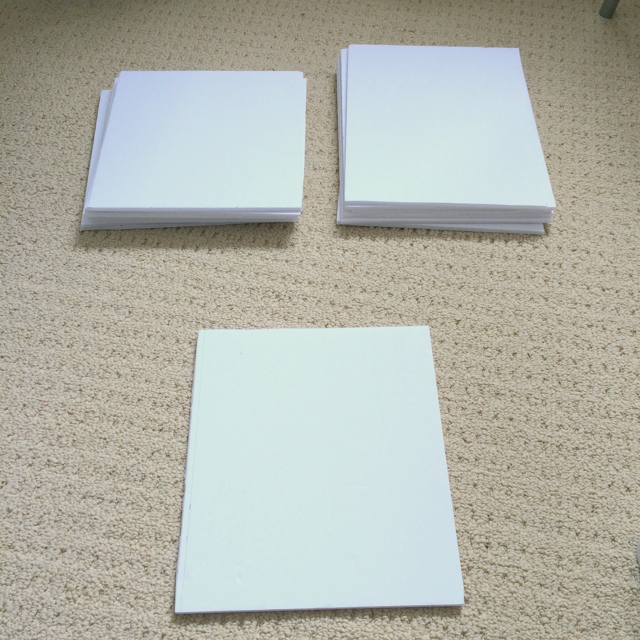
STEP 2
Once my pieces were all cut out, I then used white duct tape, and taped the pieces together.
I made 5 boxes and kept one as a template to have.

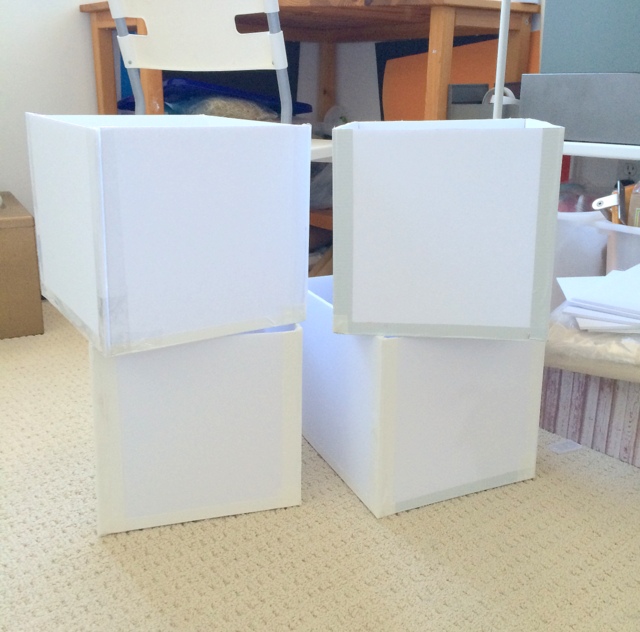
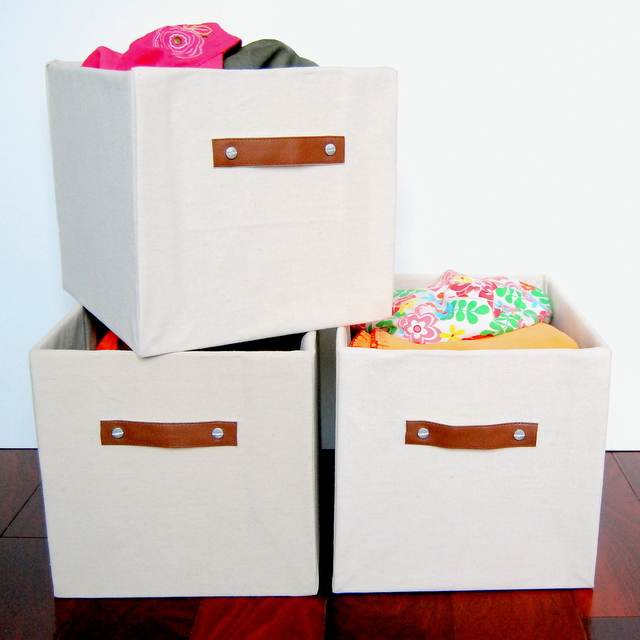
Voila! Your very own custom sized storage boxes.
These cost me $5 in foam boards and $1.25 in white duct tape. It would have been even cheaper if I bought a bigger bulk roll of duct tape.
STEP 3
Now, how you decorate yours, is up to you.
Washi tape, yarn, fabric, twine, cord, stickers, felt, glitter, wood veneer, pom poms, flowers, paper. Whatever floats your boat.
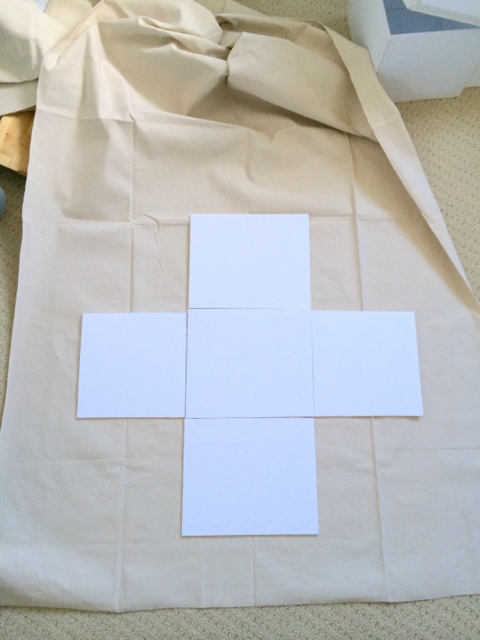
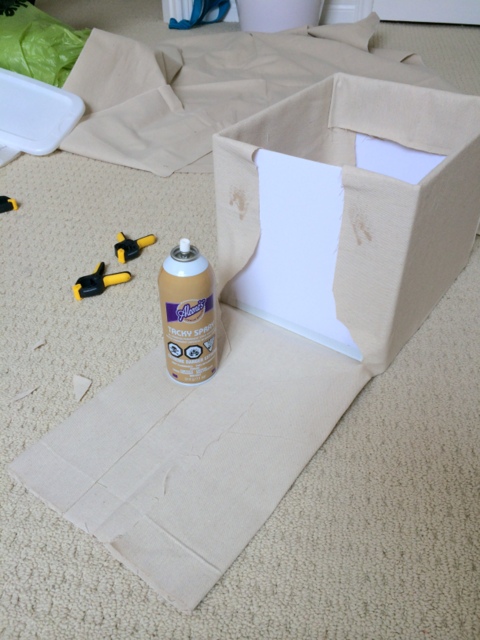
At the time, I went with drop cloth. I used my template pieces to cut out a swiss cross pattern from the drop cloth for each box.
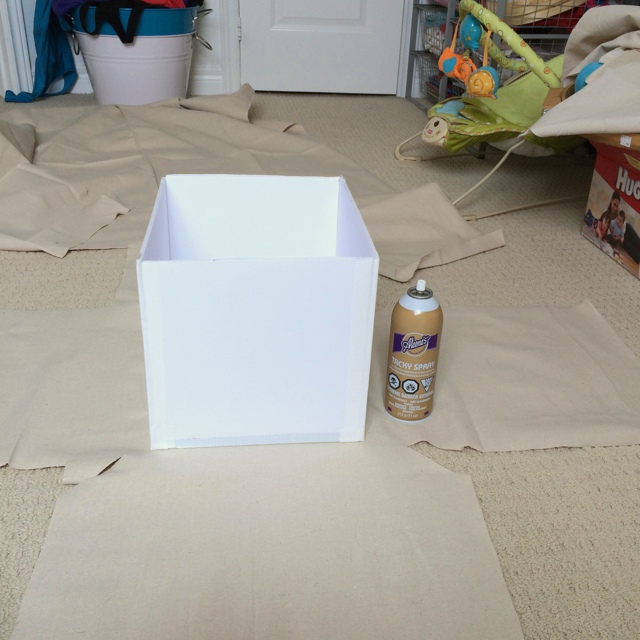
Then used spray adhesive to glue the fabric to the boxes. I used Aleene’s Tacky Spray.
THE HANDLES
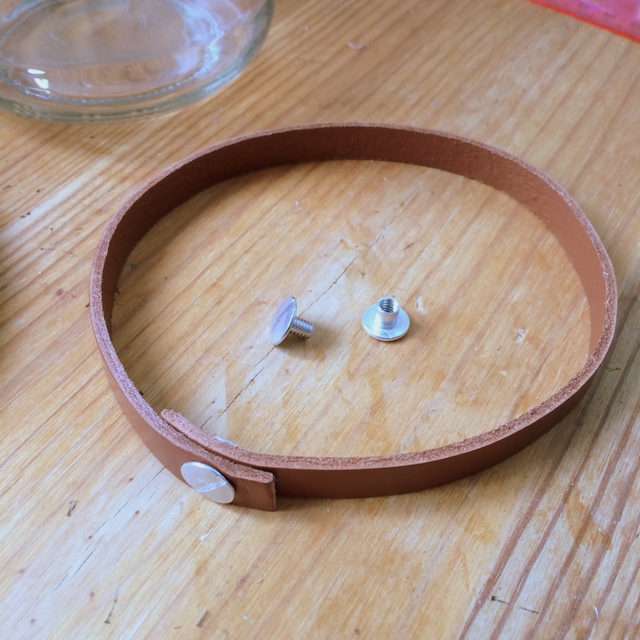
For the handles I re-used handles from an old worn down tote bag that were faux leather and used Binding Screws (otherwise known as Chicago Screws) to attach the straps to the boxes.
If you’re not familiar with Binding Screws, they’re basically a flat edged screw, that is inserted into a hollowed out part, that you screw together. So unlike rivets that you have to hammer together, these can be manually twisted together.
Which is important because you don’t want to damage your foam boards attaching any handle to them and using a hammer, will absolutely do that.
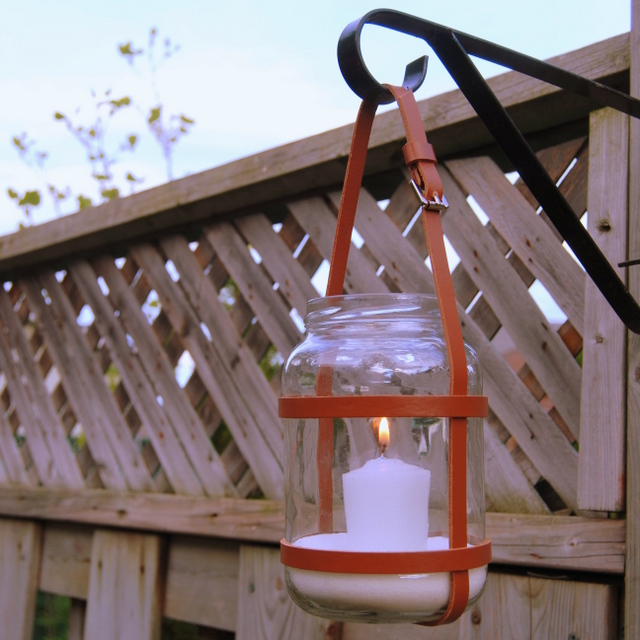
I’ve used them before on an Upcycled Leather Lantern I made:
This is what they are called in Home Depot – Chicago Screws.
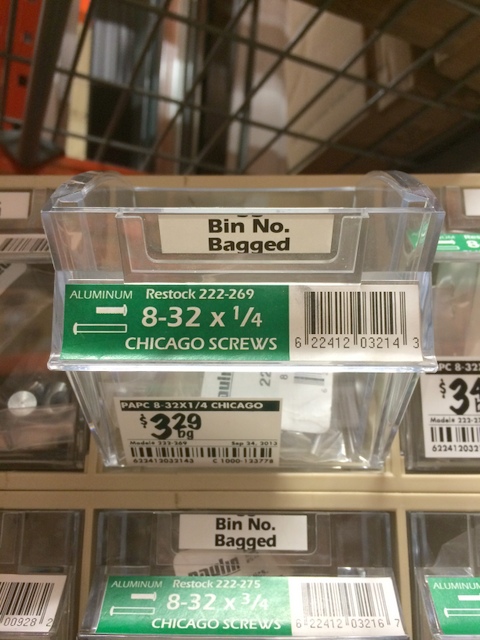
And this is what they’re called at Lowe’s – Binding Posts.
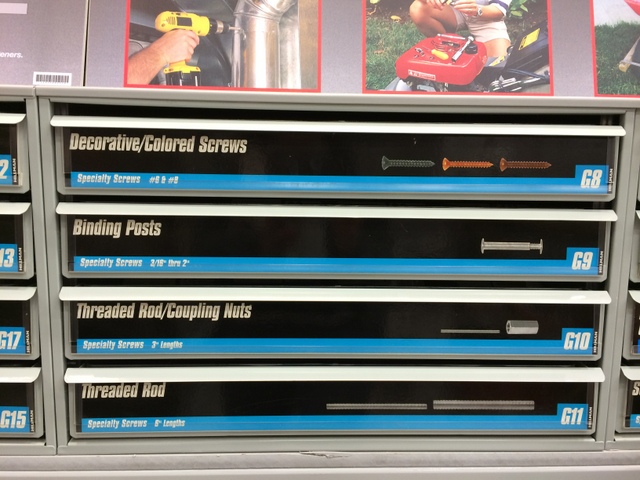
Why they’re called two different names, I have no idea.
But they’re the same thing. And you can get them in whatever depth that you need for your project. You can also buy then online in bulk on Amazon.
For these I used binding screws that were 3/8″.
And now I had myself some nice storage boxes. THAT FIT!! Finally.
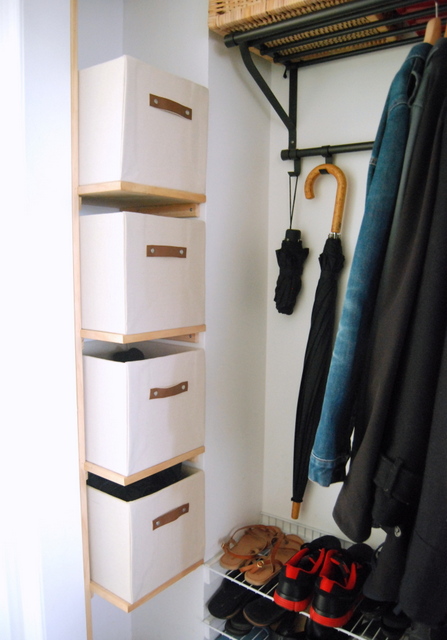
And now our tiny closet, in our tiny entryway, that I complain about all the time, is starting to look a little nicer. They’re very sturdy and yet lightweight so I am very happy with how they turned out.
But I’ll be honest, if I was to do it all again, I probably would have made them with a darker fabric. Because I am pretty sure as nice and clean as they look now, in a years time and another Canadian winter, I am going to be hunting down grey felt.
Good thing I made an extra template.
UPDATE:
It’s been almost 7 years since I made these boxes. Yes I just wrote 7 years but this tutorial is still helping out people everywhere, which is amazing!
And can you believe I still have the boxes? Shockingly, they’re still clean. So that paragraph you just read about them getting dirty, did not transpire. I am leaving it up just because it’s funny to me.
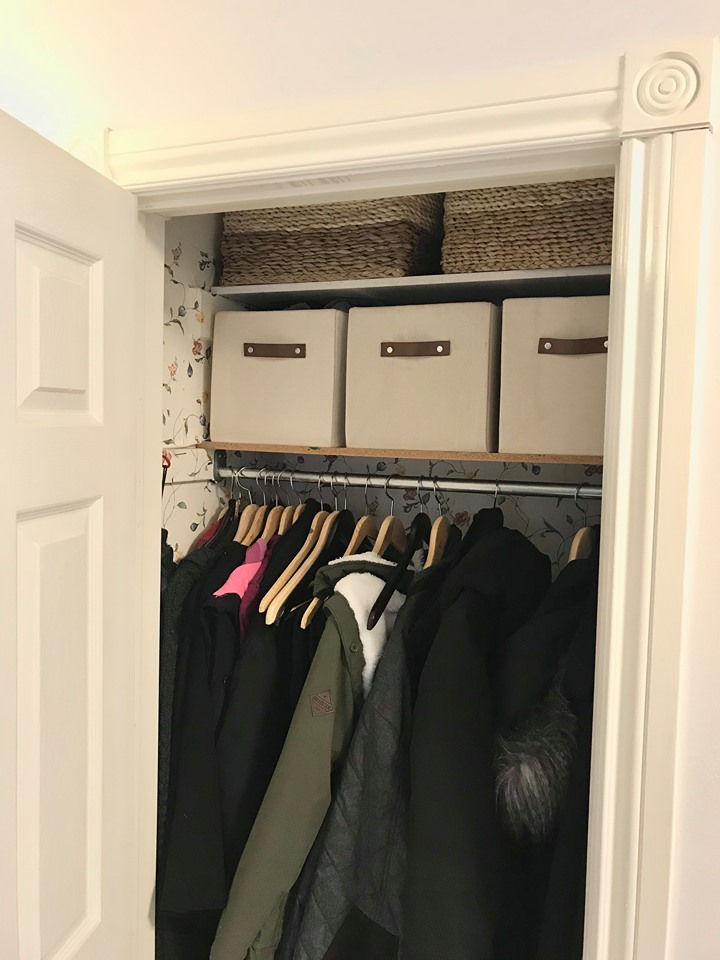
We’ve moved homes and I am using them in our current front closet. Where they match the measurements of the old closet shelf size. The irony of that doesn’t escape me.
That wallpaper is not mine and was left behind by the previous owners. It’s about as kitschy as you can get but hey, at least this closet has a door.
I hope this tutorial helps you with all of your hard to fit storage spaces in your home!

62 Comments
Moe a.k.a.@biggirlblue
June 17, 2014 at 1:00 amOk, these are amazing. What closet couldn’t use some of these. This is probably a stupid question but what is “drop cloth”? Thanks for sharing!
Alex
June 17, 2014 at 8:17 amDrop cloth is a giant piece of fabric that you use over your surface area to help prevent paint from dripping on your floor, furniture etc. You can get them at any major home improvement store. Just for this I’ll go find a photo of the one I used for this and put it in the tutorial. Hope that helps!
Vanessa Hooper
July 2, 2017 at 6:14 pmHello, I don’t think you ever included a picture of the drop cloth, which is fine, but can you tell me the approximate cost of the drop cloth? I was wanting to use one to maybe make drop cloth & Burlap Flowers. I have heard a lot about them, but never bought one. I’m assuming they have them at Home Depot, or my local hardware store, but i need to know if they are cheaper than just buying fabric? Thanks for the great post!
Alex
July 5, 2017 at 9:53 pmHi Vanessa! I got this particular drop cloth at Lowe’s. Home Depot also carries it. They are surprisingly different but it’s a slight thickness and tone of the drop cloth. Definitely just check both stores as it’s just a matter of personal preference. They’re in the painting aisle.
Elizabeth Heritage
July 5, 2017 at 11:02 pmI don’t know about Canada, but in Colorado in the US, the 6′ x 9′ cloth is $10.98 at Lowe’s. They come in different sizes so you just have to check.
Inspire Me Heather
June 17, 2014 at 8:55 amYour storage boxes look great Alex! Perfectfor making your own size to fit wherever. I think they would look good in grey felt too!!
Alex
June 17, 2014 at 3:51 pmI was initially going to make them in grey felt but never ordered it on time. I’ve got tons more of these in diff areas I have to get done so maybe for future ones.
Lynne Knowlton
June 17, 2014 at 9:05 amBefore the fabric goes on … They would make great light boxes for photographs too !! Right ? Right 🙂
Alex
June 17, 2014 at 3:52 pmTotally great idea for a light box. The key is to find pieces of foam board that don’t have a wavy line pattern to them or else they’ll show up like waves in the background of your pics.
Jan
June 17, 2014 at 9:56 amPerfect timing! I just read a post about organizing my fabric stash and I can build these boxes to just fit the shelves I have for the fabric.
The only thing I would add is a label. Either a hang tag tied to the handle, or I think there are little chalkboard tags with adhesive on the back—or they could be glued— to the front and then changed as the contents change.
Love this. So glad you had this problem to solve. Excellent solution.
Alex
June 17, 2014 at 3:53 pmGreat to hear! Foam is so easy to trim and cut so they’re very customizable for all those annoying spaces that you can find boxes that fit. Definitely a label for anything you need organized!
Midsommarflicka
June 17, 2014 at 3:35 pmOh, I love how they look! Such a nice style!
Love, Midsommarflicka
Tania
June 17, 2014 at 8:07 pmOho! Now these look sharp!
I love storage boxes/ bins/ baskets and am always on the lookout for cool diy versions. How sturdy would you say these are? I want to make toy boxes to go under our bookshelves, but I wonder whether they would be able to withstand a 9-month old who likes to prop herself up on everything she sees… eh, probably not. But for something out of her reach… genius!!
Andrea@personallyandrea
June 18, 2014 at 8:45 amWay to make great use of your closet space Alex. Closets are my Achilles heel…grrrr!
Victoria • Restoring our Victorian
June 18, 2014 at 8:55 amSo smart! I have a project I have been wanting to try with drop cloths… (Which maybe I will get around to in the next five years,) have you tried washing them? I see some people have done the have wondered how it turned out?
Katherine M
February 1, 2015 at 3:39 pmWe wash the drop clothes I covered the patio furniture with (to keep the new cushions from getting yucky from blowing pollen) and they turned out perfectly clean and fresh. Just had to re-drape them (and tuck and tie) them back onto the patio furniture and they looked (and felt) as good as new.
Jo-Anna@APrettyLife
June 18, 2014 at 4:25 pmThese are SO great! I’ve never thought to make my own…SO much better!!
fynesdesigns
June 18, 2014 at 8:08 pmThese look awesome Alex! Great project. Looove the leather handles!
Lauren @ The Thinking Closet
June 20, 2014 at 2:00 pmI think you might be giving IKEA a run for their money with these. Who would’ve guessed that you could create such chic home storage with foam board?! (Clearly, you did!)
Margaret
June 21, 2014 at 5:35 pmUm… seriously. A-MAZ-ING!!!
penny g
June 22, 2014 at 3:08 pmhow about scotch guarding them? you can buy the scotch guard in a spray can in walmart…
Jan
June 22, 2014 at 3:15 pmLove it and it is fantastic… been out shopping and couldn’t find any to fit or they were tooooo expensive!!
Thanks for saving my pocket-book!!
Shanice
June 23, 2014 at 2:41 pmSuch a fantastic idea! I would love it if you joined and contribute your awesome posts at my link party at City of Creative Dreams, starts on Fridays 😀 Hope to see you there at City of Creative Dreams Link Party.
thelearnerobserver
June 30, 2014 at 6:15 pmYou are a DIY genius and I love your brains! Also, thanks a MILLION for the info on what binding screws are called at the hardware stores! Life saver!
Yasmina
August 7, 2014 at 11:19 amI really need to try this out!
So clever !!
Frenchy
August 15, 2014 at 6:06 amI LOVE, LOVE, LOVE your idea (did I mention I love it?!) I will steal it, without any remorse or shame, because that is EXACTLY what I was looking for, for my own ‘tardis’ cupboard where my family and I store everything and which has driven me crazy over the years. I have found the solution thanks to you. 🙂
Denise McWhorter
August 28, 2014 at 7:50 amHoping to get with my daughter-in-law to make some of these. I need someone to help me along. lol But she is such a craft person and she loves to stay busy! Thanks for your blog of ideas! Keep them coming. They are inspirational.
Desiree
September 18, 2014 at 11:07 pmThis is perfect and will save me so much money! Thank you! Love love this!
Candy
March 1, 2015 at 9:36 amI think you did a great job and I am off to make these.
Jaisri Parthasarathy
April 6, 2015 at 7:22 pmHi. Love the box idea. Just want to know how they have held up? Are they strong enough to withstand the constant pulling and pushing?
Thanks, Jai
Alex
April 9, 2015 at 12:47 pmApologies on the late reply Jai. They’ve held up great! Even I am surprised given that we use them every single day (they’re stuffed with scarves, hats and mittens). I don’t even use the handles as much as I just pull the top of the box and even that hasn’t rattled them. I will say that if I ever re-do them, I will use a darker fabric just because cream and white don’t tend to stay very um, unclean over a long period of time. But in terms of daily use they’re great!
Whizzy
August 26, 2015 at 1:23 amHallelujah!! I’ve been wanting to figure out how to utilize one of those shoe cubbies that have something like 30 cubicles that are long but narrow & short to serve as a storage system for my smaller sewing/quilting supplies and notions as well as fat quarters but haven’t been able to find anything in stores that would even remotely fit in the individual shoe cubby holes. I was thinking of making fabric storage boxes but didn’t want to really go to the effort of figuring out seams, etc. I want something really fast that I can knock out quick & this fits the bill perfectly. Now I can buy the shoe cubbies & know that I can have boxes to put in each hole/cube for storage. I’ll try and post pictures of my DIY project and make sure to give you credit!
Juveriah
February 3, 2022 at 5:18 amPlease can you tell me what is the thickness of the board ?
4mm or 5mm?
Jessica Deziel
September 16, 2015 at 6:54 amVery impressive, I am so excited. I have not been able to find those perfect boxes that don’t cost a lot of money. I think I am making my own now. Thank you for the idea!
Judy McClelland
December 26, 2015 at 4:25 pmVery nice. Thank you for sharing.
Caroline Knox
January 10, 2016 at 10:32 amThere are awesome! How think is the board?
Alex
January 11, 2016 at 2:34 pmThe board is exactly 4mm. Which you wouldn’t think is strong but I have these boxes now in our new home and they’re still in the same shape as they were when I made them. Believe me no one is more surprised than me that they’ve lasted this long as I truly made them for use in that space (the old closet) only. But they’re holding up great. No shape change at all.
Jessica
June 11, 2016 at 9:05 pmOh My Gosh! This is a life saver! My dad wanted to get rid of an old wood shelf and my dad said he would turn it into whatever I needed, I gave him the measurements for the standard cube storage size so I could go to any store and buy cute baskets, well he decided they needed to be bigger..16×11…there’s no baskets that are crazy tall like this haha I will have to make my own. Thank you so much for this awesome tutorial!
Kim Santillo
September 1, 2016 at 8:29 pmI want to thank you for these instructions!!! I have a 3 cubby shelf that have odd shaped cubbies. I have been searching for the perfect DIY, and now I found it!!!! I can’t wait to make them.
Shelia P Kreick
November 21, 2016 at 4:19 pmThis is the best tute! I don’t usually take the time to comment but you did a great job! I have seen MANY other foam board ideas and thought “no way” and I’m an all around crafter and woodworker. The duct tape idea is perfect for strength and I use drop cloth for many projects. I will definitely be doing this… I’m consumed with the possibilities!! Thank you so much for the inspiration and tutorial!!
Alex
November 27, 2016 at 5:05 pmYou’re most welcome! They’re still in use at our new home and look as good as new. Believe me when I say, no one more surprised than me.
Bharti
November 28, 2016 at 8:59 amHey thanks for the post.I found your post very useful to me in such a messy mind and time of mine.I just organised my cabinet with cardboard boxes and removed all hangers as i have small space. Your Styrofoam box organisers are simple and mess-free and more durable than cardboard boxes.??
Alex
November 28, 2016 at 9:03 amI found that too. I’ve made boxes before with cardboard but depending on the thickness of the box, paper can not hold up over time as well as bend. Styrofoam is definitely sturdier. We still use these after all this time.
Lisa
April 1, 2017 at 7:22 amThank you for posting this! I have been looking for storage bins for my kids drawers, everything seems to get mashed together, never thought of making my own! Great budget idea!
Kimberly
July 26, 2017 at 7:37 pmMy cubbies are an “annoying” 11.5″x9.5″x13.5″ I might just have to do this, I need tops on mine though.
Alex
July 27, 2017 at 9:49 pmHow much do I love that you have exact measurements like that? I am the same way. It would 12.5 and I would know because I would be trying to cram in a box into a space. We’ve moved since I wrote this post and I am still using them after all this time. Believe me when I say no one is more surprised than me that they’ve lasted as long and are still in such great shape.
Angela
October 27, 2019 at 3:32 amI’m sure lids could be made exactly the same way but bigger so they drop over the top. Remember to allow enough leeway for the fabric covering on the box and inside the lid. I’ve often got too exact on my measuring and find it’s gets too tight. Commercially made ones allow a certain tolerance.
Stephanie
June 28, 2018 at 9:30 amOMG Thank you sooo much for this! I have a little store with 30 storage cubes that fit NO KIND OF STORAGE BINS! I am going to make these asap to get the shelves organized finally! Thank you so much! Also love that you’re from Canada so I know exactly where to hunt down the materials! Yay! Cheers 🙂
DerSchuhmacher
January 18, 2019 at 10:12 pmHi,
I am making a tower for my bathroom and can’t find the size cubbies I want, so I am going to use your how-to.
My question is how much overlap should I do? I see you show the pattern, but then already cut out and I am unsure what I should do as for laying out the cross pattern on the drop cloth.
Alex
January 21, 2019 at 10:38 amI wish I could tell you I had a pattern but I honestly freehand cut this. So what I did was I laid out my box foam pieces that I had cut out, in a plus shape (+) on the big piece of fabric laying out on the floor. Then I traced the plus shape onto the fabric, except I traced the fabric cross/plus sign about 2 inches bigger than the cut out foam core box pieces laying on the fabric. You really only need enough material to overlap the edges of your foam pieces and I used way more fabric than I should have when I did these because I honestly wasn’t sure if it would hold together, so I just tried it out. If I redid it, I’d take my time to make it look cleaner on the inside (not that anyone sees the insides of the boxes anyway but you know, details…)
Because everyone’s boxes will all be different sizes, it’s your discretion as to how much fabric you need and if you’re doing an inside lining for them. Just have enough to wrap the edges and still be able to glue the fabric to the inside edge.
I still use these boxes all the years later in our new house. And they still are in the same state as the day I made them and believe me, no one is more shocked than me about this.
Connie Kershaw
January 29, 2019 at 10:57 amThank you ! That was my question how much overlay. Did you sew the sides together first or did you just glue them with the overlay?
Alex
January 29, 2019 at 12:57 pmThere was no sewing at all. I glued one side first, then the opposite side, followed by the top. It really depends on how picky you are about how you want these to look. I personally didn’t pay attention to the inner lining but if someone has a preference, then it’s just up to the discretion of the person making them.
rhonda8888
May 23, 2019 at 3:06 pmSpray paint would cover up the light color. Or spray with scotch guard. Probably would only need it on front and two sides.
Linda Lott
June 5, 2019 at 11:37 amI have the same problems with all my kitchen shelves. I bought the racks to put i my shelf for my cups and the shelves are to short. When I tried to put the cups on the shelf, they didn’t fit. But this is a handy idea for when I need boxes or baskets, which is always.
Dakota Wood
July 6, 2019 at 4:56 pmI love the creativity! I need some odd sized ones that I couldn’t find anywhere. So I thinking about it doing this as well, except I need two 20in (L)x 10in (W)x 6in(H). My question is how sturdy are these for the use of clothes? I’m afraid if we were to use these the bottom foam board would break or something.
Cheryl
August 7, 2021 at 12:15 pmThanks for the tutorial. Gonna try make some this weekend.
Erika Studabaker
September 15, 2021 at 11:45 amFinally just made a whole bunch of boxes thanks to you! All that is left is putting on the handle. Do you have a link for a good leather option? Also, what tool did you use to get a hole through the leather, fabric, and foam board? Thank you!
Alex
September 20, 2021 at 4:16 pmHello again! My fav leather strap sources are on etsy. Just search for someone near your geographical location. I have a leather hole punch which I picked up at Michael’s but Amazon also has a big selection. In terms of cutting through the foam, I *think* (it’s been awhile), I just made a small incision using an X-acto knife.
Just a rule of thumb for any craft, always test out something you’re unsure of on a scrap piece vs the final product. I have ruined many, many projects doing it otherwise. I still can’t believe I have these boxes all these years later. At some point you’d think I’d update but nope. They’re still in the closet.
Valerie Sebestyen
March 5, 2022 at 10:01 amHelpful in 2022! Thank you
Eric Sims
April 28, 2024 at 7:06 pmLooks like this tutorial is still helping people in 2024.
Kelyn G
July 7, 2025 at 3:43 amStill helping people in 2025 😁😁🫶🏻🙏🏼
Susannah
February 22, 2026 at 5:40 pmAnd in 2026. Going to the dollar store tomorrow. Because my house must’ve been made by the same people that made yours – nothing fits.