
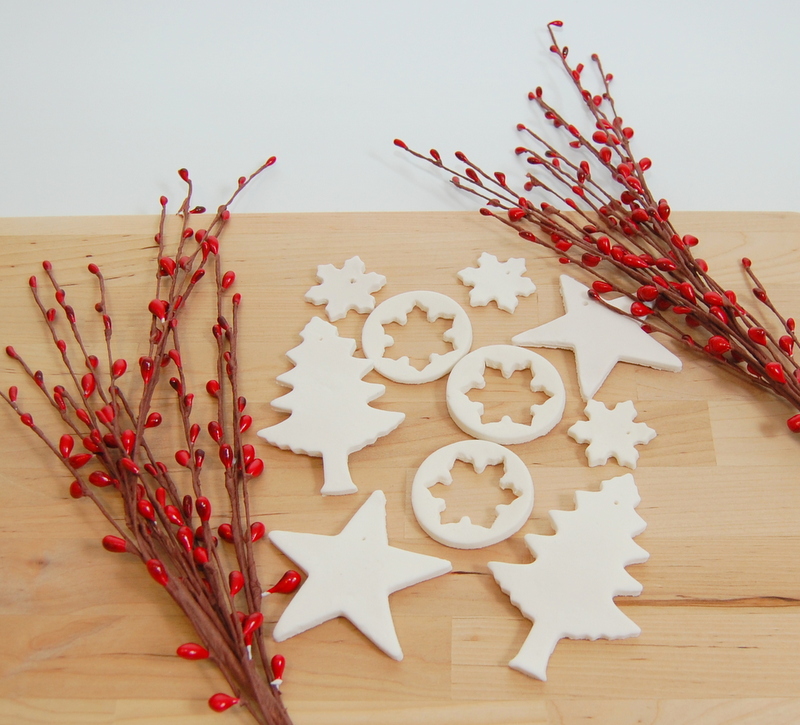
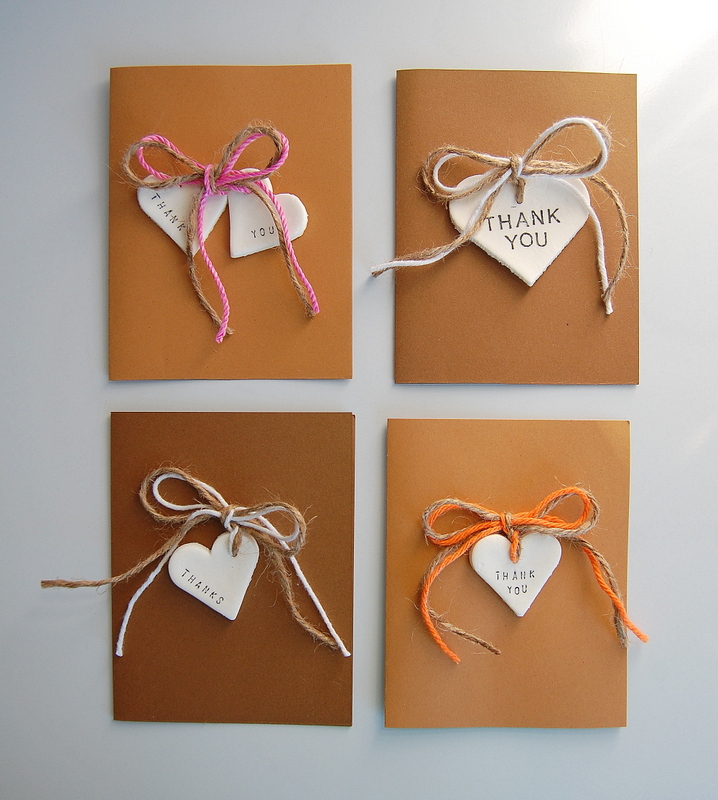
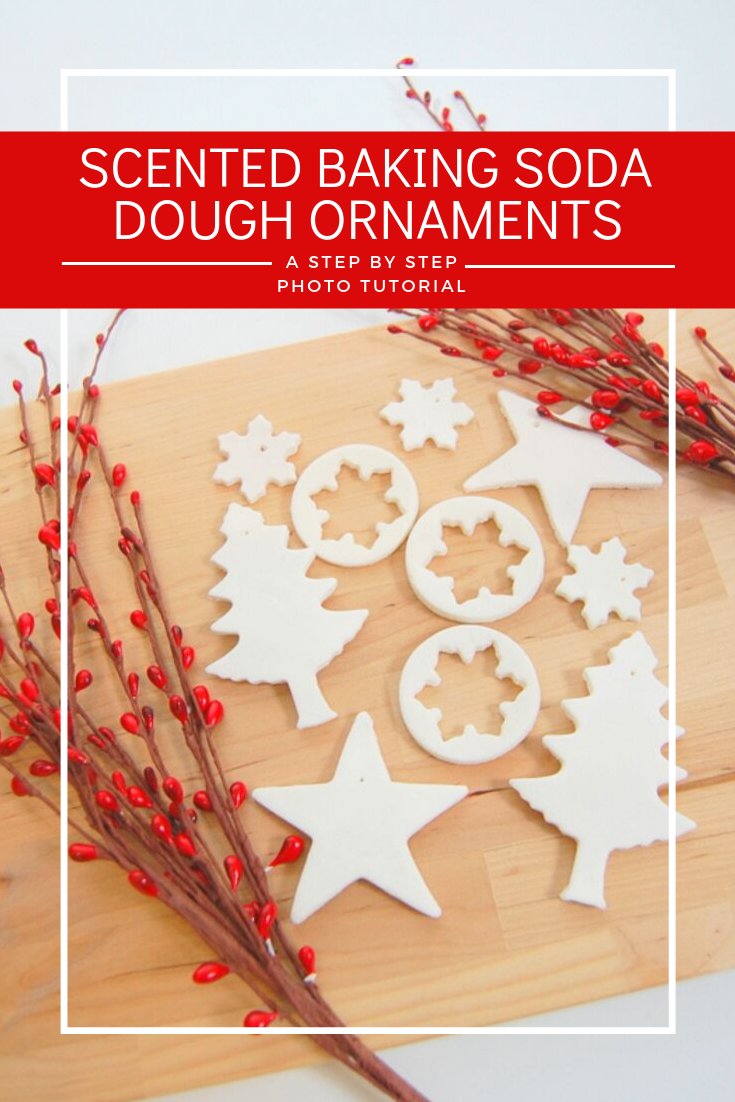
Introducing scented baking soda dough ornaments. Awhile back I did a post for Thanksgiving where I made some Rustic Thank You Cards and featured some homemade baking soda dough ornaments as part of the card craft. This craft I honestly whipped up last minute and it has since become one of the most shared posts and card crafts I have done to date.
So I finally set aside some time to write up how I make my baking soda dough ornaments and include an easy step by step photo tutorial, as I always appreciate that with any recipe – food or otherwise. I did a bit of an experiment with them at the same time and decided to see if I could add a scent to them for a little something extra.
How to make Scented Baking Soda Dough Ornaments
What you’ll need:
- 2 cups Baking Soda
- 1 cup Corn Starch
- 1 and a 1/4 cups of water
- Several drops of Cinnamon Oil Flavour or Essential Oil in the scent of your choice (I tried out several different ones)
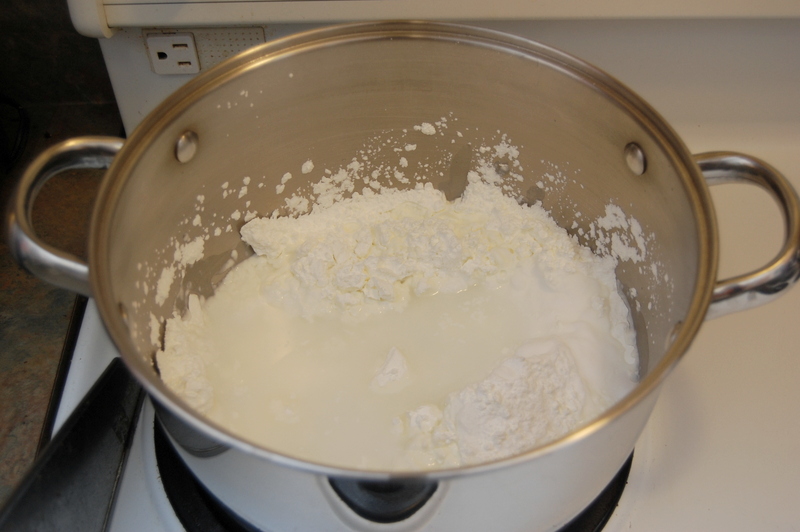
Step 1
Mix Baking Soda, Corn Starch and water in a big pot on your stove on a Medium heat. I put my burner setting on 5.
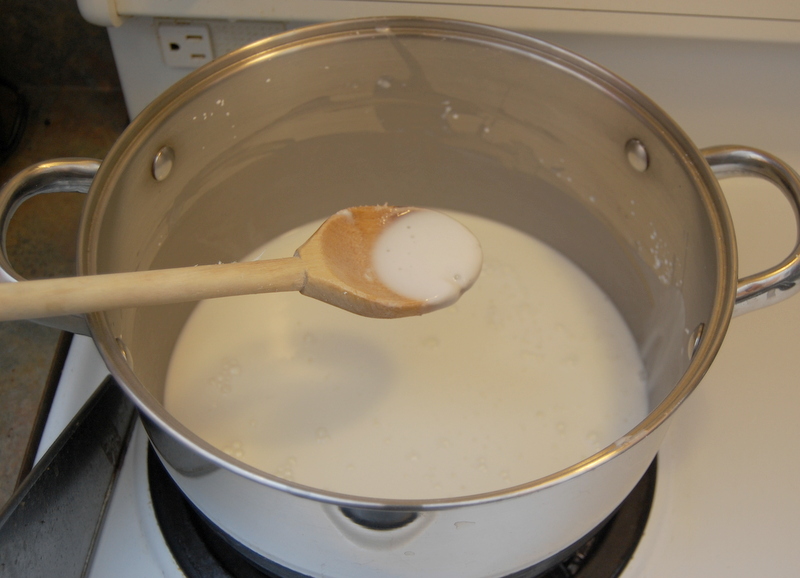
Step 2
Keep mixing. In about a minute it will look like this.
At this point put in several drops of your Cinnamon Oil. I purchased this one at Bulk Barn but you can absolutely use your favorite essential oils in this. I did not discover essential oils until much later so if you can’t find any near you, a simple one from the food flavoring aisle will work just fine.
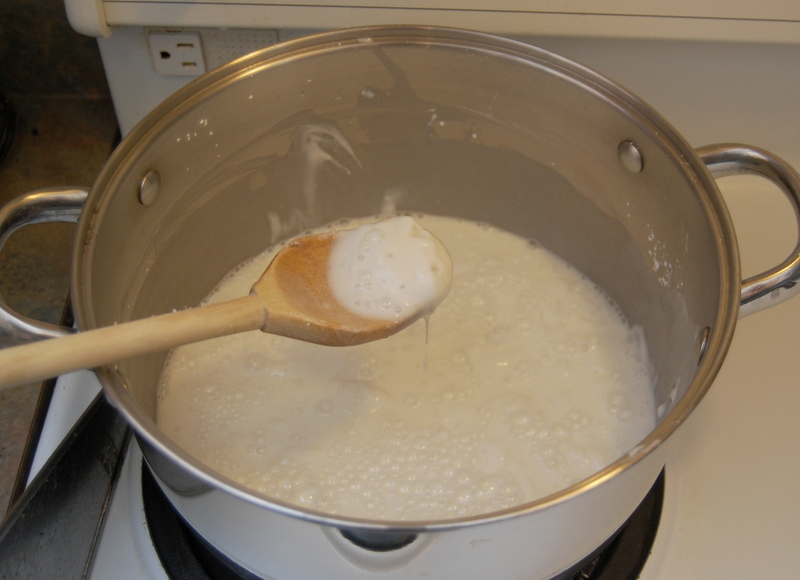
Step 3
Keep mixing. It will start to boil and bubble at this point so you will need to scrape the sides of the pot well.
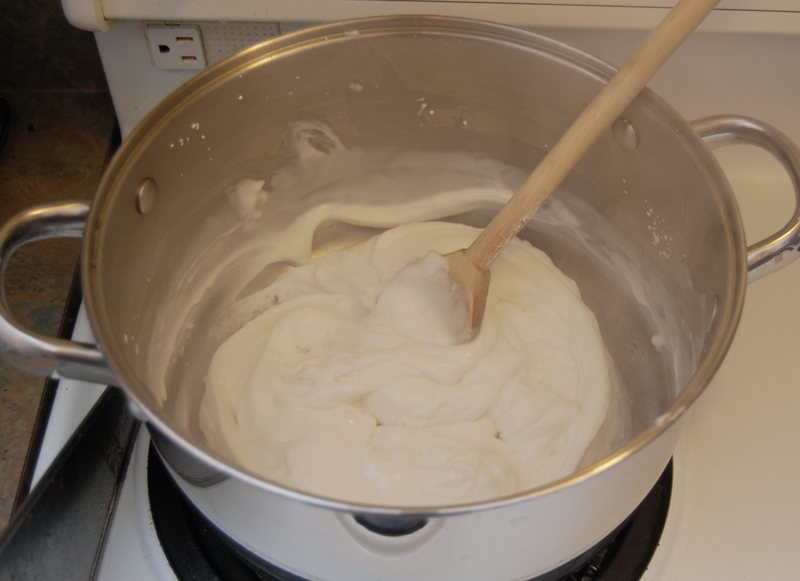
Step 4
Mix, mix, mix. In under 5 minutes, you should have a ball of steaming hot dough.
Step 5
Remove dough from pot and let it cool on a plate or bowl.

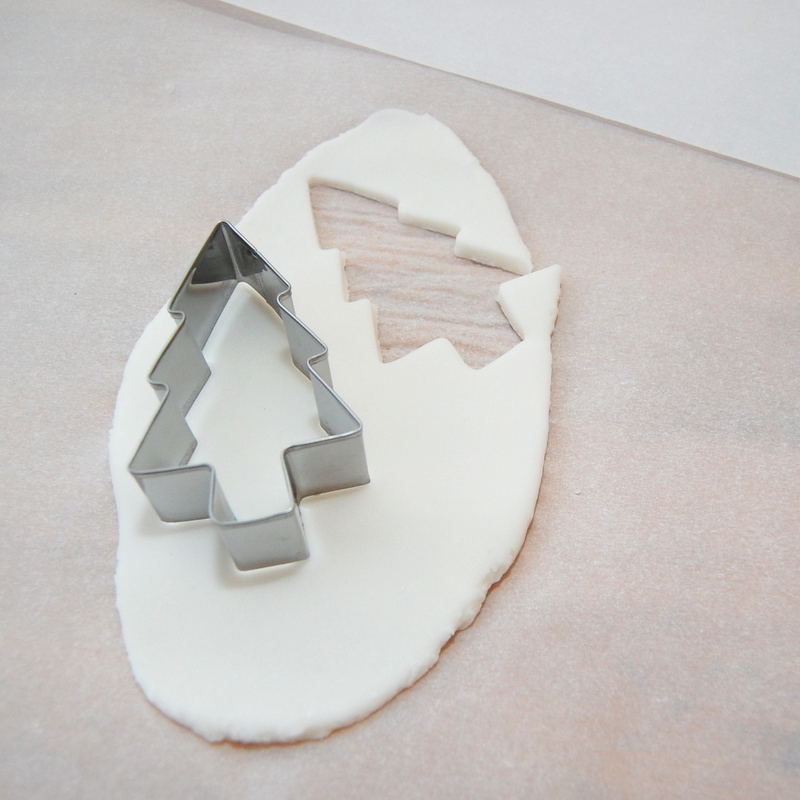
Step 6
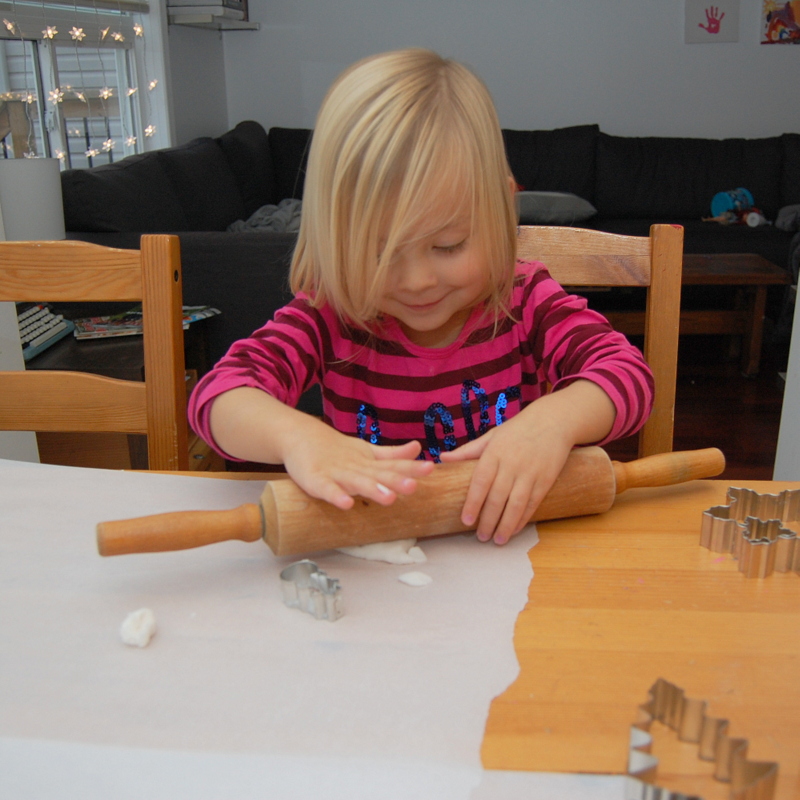
Once dough is cooled, flatten and roll it out and use cookie cutters to make your ornaments.
Cute helper not included.
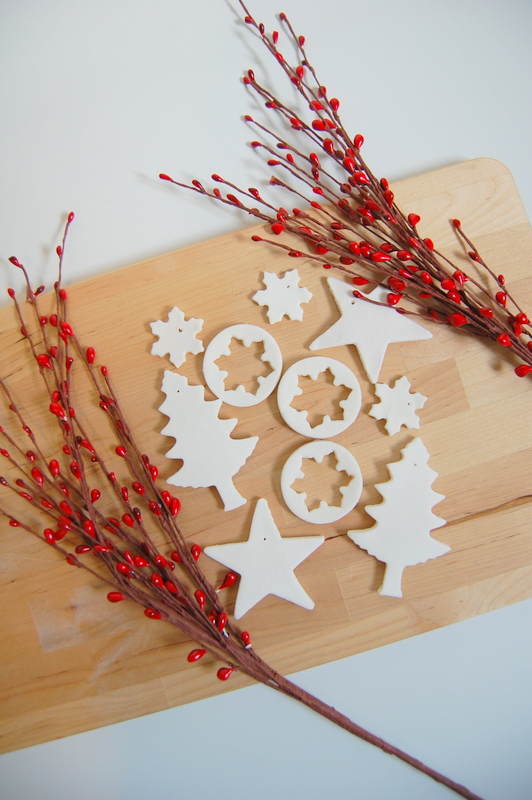
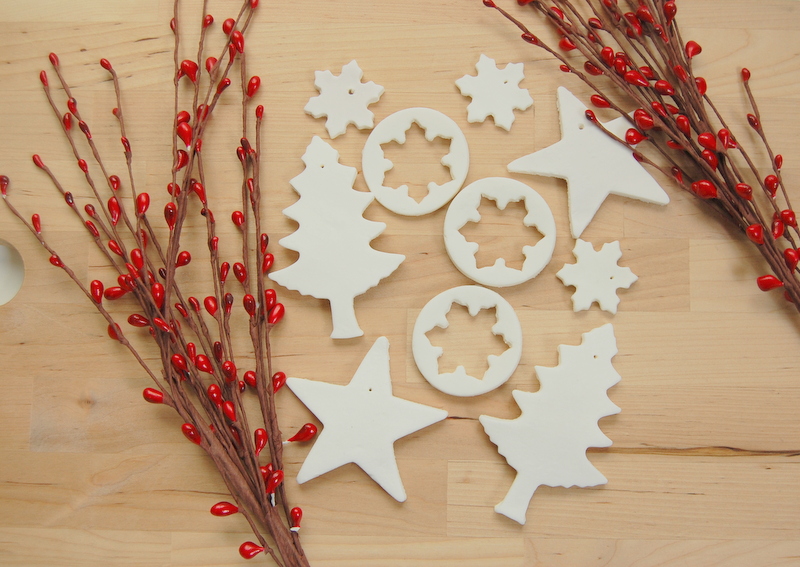
Step 7
Let dry and you’re done your fancy scented baking soda dough ornaments!
Here are some tips when it comes to making these I have learned through trial and error
- LET THE DOUGH COOL. Things that are hot expand. Thus if you try to use the dough while it is warm, you are going to have a much harder time trying to cut out the shapes. It will be as fun as you trying to use cookie cutters on melted marshmallows.
- You will find the edges of the dough become crusty as it sits. Do not panic. Just knead it into the batch and you will be able to continue to use it without any issues.
- If you’re still having a hard time kneading and shaping the dough or find it sticking to your surface, sift some corn starch on your table and knead it into the dough. This will help make the dough more pliable. Sometimes I roll it out on parchment paper, other times I just roll it out directly over my kitchen table.
- When you let your ornaments dry, in order to avoid having wrinkled wax or parchment paper marks/lines on the backs of them (as the moisture from the dough will cause those types of paper to wrinkle), lay them out to dry on a flat solid surface. I use cookie trays. Usually it takes a minimum of 2-3 days for them to fully dry. I know many people choose to bake them in the oven to help them dry faster. I don’t do this because I don’t want to chance burning them or changing their color.
- After a day of drying, turn them over to allow the back sides of the ornaments to dry out and flatten out. The part laying on the surface will be moist so you need to flip it so that the underside can dry as well. Sometimes they can curve in at different angles if they sit on the same side the entire time so this helps the ornaments stay flat in their shape.
- Puncture your holes in the ornaments BEFORE they are dry. Yes I had to write that. You would be amazed at how that simple step is overlooked when you’re doing batches of these.
- This recipe will yield you approximately three, 10″ x 15″ cookie trays worth of ornaments.
- The biggest difference between this dough and traditional salt dough is the salt dough ones will be more cream colored in their appearance and rougher in their texture. Baking soda dough is pure white and much smoother.
AS FOR THE SCENTED DOUGH PART:
I did these with two different scented oils.
One batch I made with clear imitation vanilla oil, the other was the tinted cinnamon oil above. The vanilla ones made with the clear oil darkened the dough overall a touch and yet the colored cinnamon oil left them pure white. Go figure.
The vanilla scented ones didn’t work or last nearly as well as the cinnamon ones. You could tell it smelled like vanilla but there was still a bit of the baking soda dough scent going on. And I used a LOT of vanilla.
But the cinnamon scented ones were amazing! The scent will be a tad overwhelming when they’re first made, but it will settle down afterwards.
I am using a lot of these for not only for our tree but for gift wrapping embellishments as well. It’s the idea of having that little kick of a little something extra, sort of like when you open a scented card.
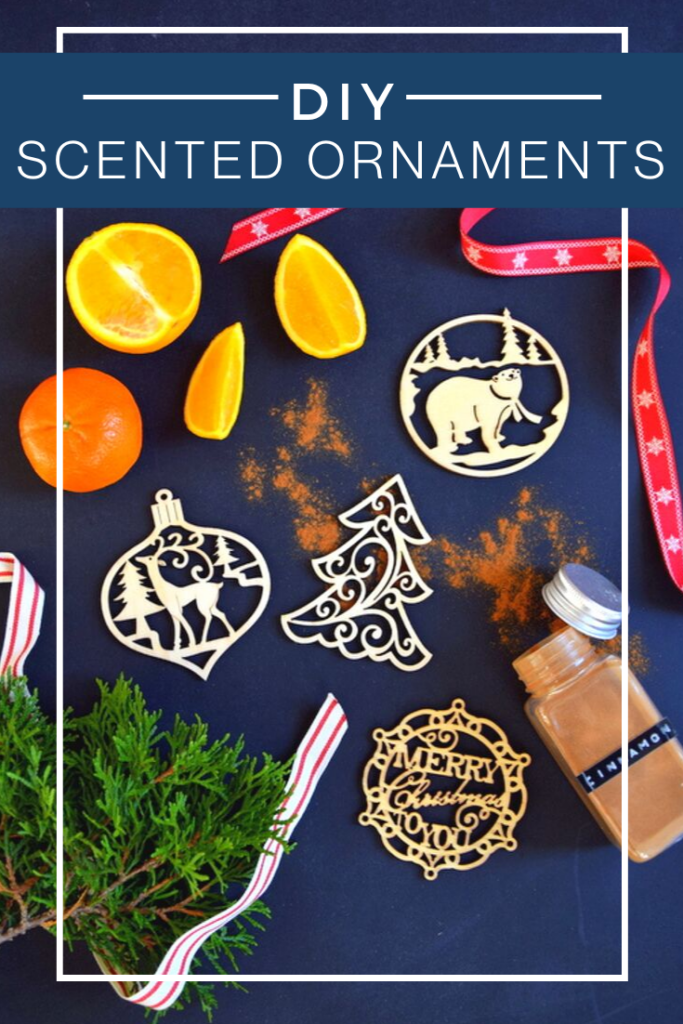
UPDATE:
I also made Wood Scented Ornaments that are even easier to make than these AND I share what happens to the colors when you use different scented oils.
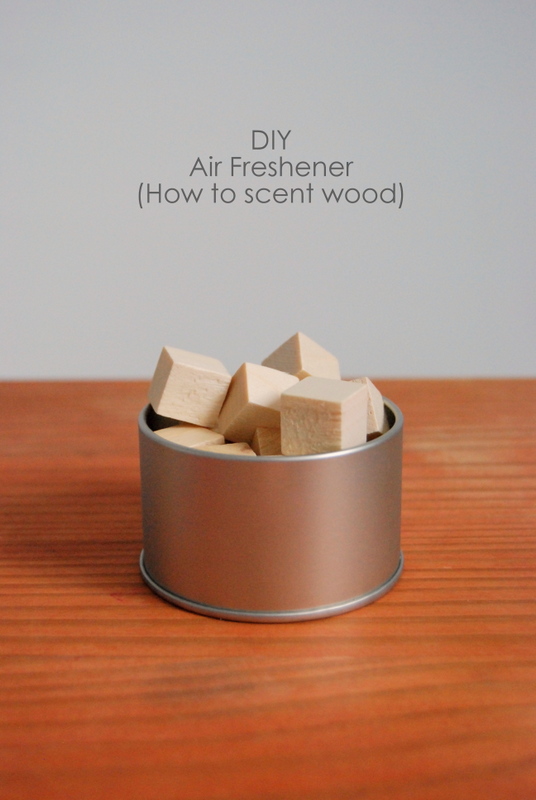
Did I also mention my DIY Air Freshener – yes you can use this to scent wood and make an air freshener as well:
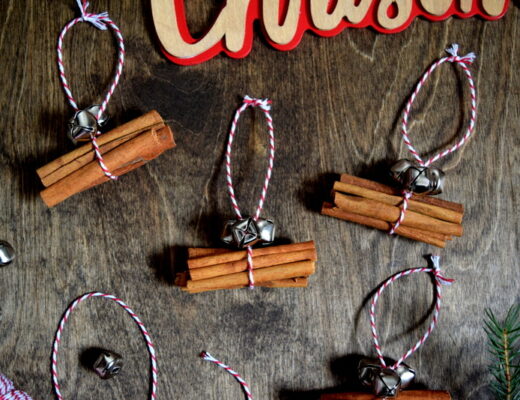
And this is the craft that started this all, the Thank You Cards:
Happy dough making everyone! I hope you love making your Scented Baking Soda Dough Ornaments as much as we do.


58 Comments
now at home mom
November 21, 2013 at 1:05 pmthese are very pretty Alex 🙂 & yes, something I would like to try making with my little one 🙂
Alex
November 21, 2013 at 3:25 pmIngrid!! I miss you! I think this is totally something he would love to do. My younger daughter must have made her own versions of them for hours.
now at home mom
November 21, 2013 at 9:45 pm🙂 oh! thanks so much Alex!
then I might try this with him this weekend, I already have the corn starch but I will use the vanilla oil because that’s all I have now. I will let you know how it goes 🙂
Nash
February 16, 2025 at 11:58 amis there a way to scent my dry plants at home?
Karen
November 21, 2013 at 3:12 pmThis may be a dumb question, but our 8 year old loves to finger paint. So would we be able to do that with these?
Alex
November 21, 2013 at 3:27 pmNot a dumb question at all. As long as they are dry you can paint them, stamp them and embellish then all you’d like. My kids have even drawn on them with markers and pencil crayons. You can even add glitter after the dough is done when you knead it to make them sparkle (we did that last Christmas). Hope that helps!
Victoria • Restoring our Victorian
November 21, 2013 at 4:25 pmI vaguely remember having some ornaments like that from when I was a kid. I guess we threw them away, because they were getting pretty mungy and gross, but they had a smell I still remember.
Amy
November 21, 2013 at 5:16 pmYou’re on a roll, lady! I love this and the scent of cinnamon is amazing 🙂
Heaven
November 21, 2013 at 9:17 pmCan you paint them?
Alex
November 21, 2013 at 9:25 pmYou can paint them, draw on them, glue embellishments on them, coat them with glitter etc. They feel like dried clay. My kids enjoy drawing on them with markers. I usually use my stamp set and stamp some.
Marie Koontz
November 22, 2013 at 6:30 amJust curious how fragile they are when dry? And what is the youngest age you would recommend for this craft? I’m a gramma and it looks like something fun to do with the grand kids.
Alex
November 22, 2013 at 2:43 pmIt depends on how thick you roll out the dough and that’s up to your discretion. And it also depends on your own Grandkids. 🙂 My 3 year old last year never had any issues with them when she was 2, but if you drop them, like any ornament there is chance that it will break. Once they’re 3 + it’s an easy craft because at that point they listen to instructions like more reasonable little people.
Inspire Me Heather
November 22, 2013 at 8:02 amThanks for your dough recipe and for the tips too, they do look great1
Jennifer @ Brave New Home
November 23, 2013 at 1:38 amLove these! Just the motivation I need to make some ornaments : ]
Thalita @ The Learner Observer
November 23, 2013 at 8:59 amThese look amazing. You are a crafting maniac! I honestly want to make some of these, and the fact that they can be scented is even better!
Nathalie
November 23, 2013 at 9:39 ami had to put at least 6 1/4 cups of water.to get a dough texture… and did not use cinnamon oïl but pure cinnamon powder…; wao do these gingerbread man décorations smell good , my whoe veranda smells like aple pie! 😉
Lauren @ The Thinking Closet
November 23, 2013 at 3:12 pmThese have such a stunning finished look! Thanks for all the tips and tricks, too. Pinning for when I tackle these (noticed I said “when” and not “if”).
Danielle from Storypiece
November 25, 2013 at 1:30 amI’m kinda pissed that somehow I missed your card post last year. They are seriously adorable! Thanks for sharing the how-to… I definitely want to try this for a craft night with friends.
Alex
November 25, 2013 at 10:52 amNah! That’s the best part of blogging. You do a seasonal craft and more people get to discover it each year.
Tricia
November 25, 2013 at 9:12 amAre they fragile at all? I would like to put them on Christmas presents that I have to ship and wondered if I should provide protection for them when wrapping several gifts in a big box.
Alex
November 25, 2013 at 10:54 amDefinitely treat them with care and like you would a clay ornament. If you’re shipping. wrap them up really well and definitely mark them as fragile. If you’re worried about them breaking, why not try wooden shaped tags instead? You can scent wood as well!
feralturtle
November 25, 2013 at 9:17 amA wonderful project! Thanks for sharing your recipe Alex! Keep warm
Maureen Watson.
November 25, 2013 at 2:22 pmCould you, or have you tried, oil of mint? I would think that would work too. Or oil of almond?
Judy White
November 25, 2013 at 2:48 pmThese are cute!I was wondering if you’d completely forgotten to mention putting holes in them for hanging, but finally read that part.These are also easy to paint with acrylics or with spray paint,but I suggest adding a clear finish after they are done.They will last longer and will hold up for years.
Charlotte Risner
November 25, 2013 at 3:22 pmI dipped mine in wax … Made them looked like they were glazed … I did a tree for my kitchen with these ,stringed cranberries & popcorn garland , tied cinnamon sticks ,I had a giant gingerbread cookie cutter so I made two with holes in hands tied them with cute ribbon as a topper ….not only looks good it smells delicious … I had lights on the tree also ..everyone that has seen it loves it … Thanks for the recipes
tracy
November 25, 2013 at 5:08 pmohhhh must do some of these with my granddaughter, she is six so will enjoy it.
have to ask though being in uk, is your cornstarch our cornflour, and you used cinnemon oil flavour, is that different from flavouring/essence or is it better to use essential oil, or as in another post the powder.
Alex
November 26, 2013 at 9:45 amHi Tracy! I checked with my blogging friend Alex over at Hydrangea Girl who lives in Ireland she said yes cornstarch is the same as cornflour over on your side of the pond. Have fun!
tracy
November 26, 2013 at 6:05 pmthank you for your reply. will get supplies and hopefully do this weekend xxx
Tara @ Suburble
November 25, 2013 at 10:44 pmSimple and beautiful!
Tell me – you can paint these, right?
I think that the girls and I are going to attempt these this weekend!
Lisa M.
November 25, 2013 at 11:05 pmAwesome! I just found the perfect parent Christmas present project for my kindergarten class! Thanks for sharing.
cred
November 27, 2013 at 9:47 amI love these, Alex. I had pinned a similar ornament last year that I had intended to make for gift tags. No tutorial, though. Now I have yours and the cards that you originally made with stamped lettering- thanx.
Could you clarify a bit on the stamping? You stamp them once dry? Using regular stamp ink, I presume? And how about the metal stamps- did you stamp those before the clay dried so that it imprinted the letters? And did you use stamp ink on the metal stamps, too?
Sorry for inquisition but I would love to make these with the kids this year- just so cute.
Alex
November 29, 2013 at 9:34 amYes the original ones that I made with the words stamped on them, I stamped after they were dry using a regular dye ink pad and a stamp set. For some I even used my metal stamp set and the ink pad but you can use either.
If you want imprinted stamps, then do it before they are dry. HTH!
cred
November 29, 2013 at 10:02 amthanks Alex. I will have to give these a go. Not sure if the ink will smudge if I want to imprint them before drying. But I will have to do a few trials to see what I get.
appreciate the reply!
carol
November 28, 2013 at 1:28 amThese are so sweet
Joleen
December 2, 2013 at 5:44 pmwhere do you find the oil to make them smell.
Alex
December 2, 2013 at 6:52 pmI purchased this one at our local Bulk Barn store.
Emma
December 3, 2013 at 10:28 pmScented! Yes!! Pretty sure one or both of my kiddos would attempt to eat them, but hey, a little cornstarch never killed anyone 😉
Alex
December 5, 2013 at 1:49 pmYour comment needs its own Like button! LOL
Patty
December 5, 2013 at 5:33 pmWhere did you find the tree cookie cutter?
Alex
December 5, 2013 at 8:19 pmI picked this one up at Bulk Barn.
Rachel
December 8, 2013 at 3:03 pmIs baking soda the same as bicarbonate of soda, we have baking powder and bicarbonate of soda in uk?
Alex
December 8, 2013 at 3:35 pmBaking soda is the same as bicarbonate of soda. Baking Powder however contains bicarbonate of soda and cream of tartar. They are two different products. I recommend you Google the differences for the products available in your market to make sure you are purchasing the same item as I am very unfamiliar with UK products.
Liz
December 24, 2013 at 12:51 pmThe dough I made is just crumbling apart it’s not staying together
Alex
December 24, 2013 at 1:10 pmSorry to hear that! The only thing I can think of is that maybe you let it sit too long and it dried out too much before you could knead it thoroughly. I sometimes have the opposite issue where it’s too melted marshmallow like hence why I recommend sifting corn starch over the surface you roll it out on. Sorry I can’t be of more help.
Liz
December 26, 2013 at 1:34 pmWonder if I left it on the heat too long? At what point are you supposed to put it on the plate because some of it was still “wet” but some of it was super brittle and crumbly? I also used the scented oil you burn, maybe it’s not oily enough? What are your thoughts?
Alex
December 26, 2013 at 2:03 pmDefinitely take it off the pot before it gets crumbly. It should still look like the consistency of play dough when you put it on a plate or a really, really thick butter cream type of icing. That’s why the mixing part is important to keep the consistency the same or else it can burn (the whole process on the stove is no more than 5 minutes). The only parts that may become crumbly would be the inside lining of the pot of your stove from the residue of the dough batch or the exterior of the dough if you let it sit on the plate too long. Very similar to if you had any dough that you were baking cookies with and just let it air dry, the outside of a batch will get dry and the inside should be more moist if you don’t cover it up. Or if you left out playdough. I usually start making ornaments within the first 10-15 mins of it being set on the plate as it doesn’t take that long too cool at all. Mind you if you have any little kids using it, check the insides when you separate the batch to roll it out and make sure it’s not too hot for their little hands. I have never made it with a burner oil so I can’t speak about the crumbliness factor using that type. I was actually thinking when I tried with the oil that it may make it harder to mold but surprisingly using 2 different oils didn’t change any of the consistency, just changed the scent. Hope that helps some!
Sol de Dezembro
November 3, 2014 at 4:45 pmWow! This is such a great idea!
Thank you
Kristine V
November 16, 2014 at 1:54 pmHow do you store the leftover dough, please?
Alex
November 16, 2014 at 2:38 pmYou can keep it in an air right container but I wouldn’t suggest doing it for a long time as the colour and consistency may change. I’ll be honest that I usually use up the entire batch when we make our annual ornaments but I have used this as a homemade playdoh recipe and having sealed it in a ziplock, definitely not longer than a couple of days.
Cindy Fordyce
November 5, 2016 at 10:40 amHi I just make a few yesterday. Another site says to leave them in the fridge over night.. But when I checked on them they were still too soft and one piece broke off. Did I do something wrong. I might need a little more water, or I didn’t let it bubble long enough. Any tips would be great. Thanks so much. Cindy Fordyce
Alex
November 7, 2016 at 10:25 amI wouldn’t put them in the fridge. If anything that would cause them to become wetter when you take them out due to the temperature changes. Sometimes people prefer to bake them to help them dry out but I don’t do that because I don’t want to chance them changing colour or burning. I mention in my notes that they do take a minimum of 2-3 days to dry (sometimes more depending on your temperature inside your home) and that you need to lay them a flat surface as the side that is on the ‘ground’ will be moister than the side facing up. So you do need to flip them daily to thoroughly dry on both sides. We usually make a batch and then let them dry out for almost a full week (so do the project one weekend and then decorate and paint them the next). Hope that helps!
Theraisa K
November 19, 2016 at 4:01 pmHow many years do these keep for? Like if I made them this year, stored them in the basement or other area of the house, will they be usable next year?
Alex
November 19, 2016 at 4:53 pmI’ve had ours for several years now. The scent has tapered off since then but in terms of their stability and shape, everything is fine and they’re holding up perfectly. So if you want to make a memento, for sure it would be ok.
Mary
November 22, 2016 at 8:50 amDo you need to store them in a warm place.
Alex
November 26, 2016 at 9:52 amNot at all. Once they are dried (fully dried) you can put them in a tupperware container or a ziplock bag and call it a day. I keep ours in a ziplock bag in the basement in a giant rubber storage bin.
Anh P
December 31, 2017 at 8:02 amHi Alex. Thank you for this amazing post. Can I use other kinds of oil for scent? Like lavender or tea tree oil? I have them around now but not cinnamon. ???? I’ve never done clay before so am now really excited to try.
Alex
January 3, 2018 at 5:00 pmHi there! Sorry for my late reply. My phone app doesn’t allow me to do right now. You can use other scents for sure! Not all will smell the same after they dry. Some of the ones that are more Citrusy and sharper in nature, tend to last longer (i.e. orange, lemongrass, peppermint). I tried Vanilla and it was disappointing but orange was phenomenal! Hope that helps.
Natascha
December 17, 2018 at 9:41 pmI loved this. We used a cup to make circles then pressed lavender mint and rosemary cuttings from our garden on them. My 2 year old had a ball and was so proud giving his own gifts to family and friends .